
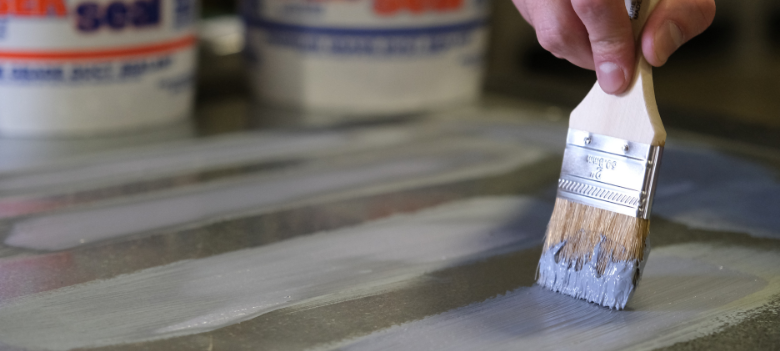
Effective duct sealing starts with careful preparation and proper application. Applying sealant at a consistent thickness, using the right brush technique, and allowing it to cure fully helps produce a durable seal and dependable system performance.
Follow these best practices to achieve a consistent, durable, and airtight seal when sealing ductwork with a brush.
Preparing the Duct Surface
Apply sealant only to clean, dry, and sound surfaces. Dirt, dust, oil, fabrication lubricants, moisture, rust, and loose material can prevent the sealant from properly adhering to the metal.
Inspect each connection before sealing. Joints should be fully seated and fastened. Poorly fitted connections or large openings should be corrected mechanically rather than filled with excessive sealant.
Before beginning:
✅ Confirm that joints are properly fitted and fastened
✅ Remove oil, dust, moisture, rust, and loose material
✅ Review the product’s technical and safety data sheets
✅ Verify acceptable application temperatures
✅ Identify all joints, seams, fasteners, and penetrations requiring sealant
The specific locations to be sealed will depend on the duct construction, sealing class, and project specifications. Sealing locations may include transverse joints and longitudinal seams, elbows and fitting connections, takeoffs and collars, access-door frames, and duct-wall penetrations.
Selecting and Positioning the Brush
Brush selection may depend on the sealant’s consistency. A 2- or 3-inch chip brush with short, stiff bristles generally provides good control around joints, corners, fittings, and fasteners. Heavy or fiber-reinforced sealants may require firmer bristles.
✅ Use a clean brush with straight, firm bristles to achieve even coverage and keep debris out of the sealant.
❌ Avoid brushes with loose, bent, or hardened bristles, which can create gaps, produce uneven coverage, or leave debris in the sealant.
✅ Hold the brush at a moderate angle, typically around 30 to 45 degrees.
❌ Do not press so hard that the brush scrapes sealant away from the joint.
✅ Brush across the seam to work material into small gaps and irregularities.
❌ Do not brush only parallel to the seam, which may leave the joint insufficiently covered.
✅ Use lighter finishing strokes to smooth the surface and feather the edges.
Application techniques will vary slightly depending on the shape and construction of the ductwork. Pay close attention to the duct profile to ensure complete coverage in areas that are easy to miss.
⬛ On rectangular duct, pay close attention to corners, standing seams, drives, and changes in profile.
⚫ On round duct, apply sealant around the entire circumference and inspect the underside carefully.
Building a Consistent Layer
Load the brush with enough sealant to bridge the joint and cover the surrounding metal. Make sure screw heads, rivets, corners, and other potential leakage points are completely sealed.
If reinforcing mesh is required, apply a base layer of sealant, embed the mesh without gaps or wrinkles, and cover it completely with additional material.
IMPORTANT: Avoid applying sealant as a thin, paint-like film. The material must form a continuous layer at the wet-film thickness specified by the manufacturer.
Work in manageable sections and avoid brushing sealant after it begins to skin over. Overworking partially set material can create drag marks, gaps, or poor adhesion.
Applying the Correct Amount of Sealant
Applying more sealant than specified does not necessarily create a better seal.
Too little sealant can cause: gaps, pinholes, exposed seam edges, incomplete coverage, and air leakage.
Too much sealant can cause: sagging, cracking, uneven shrinkage, longer curing times, and a dry outer skin with uncured material underneath.
Aim for a wet-film thickness of approximately 60 to 80 mils during normal application, unless otherwise directed by the product instructions.
✅ Use a wet-film gauge to confirm that the sealant falls within the recommended range.
❌ If the layer is noticeably thicker than a nickel, the sealant is likely overapplied.
If multiple coats are needed, follow the manufacturer’s instructions for thickness, drying, and recoating.
Measuring Wet-Film Thickness
Use a wet-film gauge, also called a mil gauge, to confirm the thickness of freshly applied sealant:
- Press the gauge straight into the wet material until it contacts the duct.
- Remove the gauge without dragging or sliding it.
- Locate the highest tooth that is wet.
- Find the next tooth that is dry.
- Read the thickness between those two measurements.
Take readings at several points, including seam intersections, corners, vertical surfaces, and the underside of the duct.
✅ Measure the sealant while it is still wet.
❌ Do not rely only on appearance. A seal may look complete while still being too thin.
Inspecting and Curing the Seal
Before leaving the application area, inspect for:
✅ Complete coverage across every joint
✅ Covered fasteners and seam edges
✅ Consistent thickness
❌ Pinholes, gaps, thin areas, or exposed metal
❌ Runs, sags, debris, or excessive buildup
Correct defects while the sealant is still workable. Allow the material to cure fully before pressurizing, insulating, painting, or concealing the ductwork. A surface that feels dry may still be uncured underneath.
Choosing the Right Sealant
Ductmate offers a variety of water-based and solvent-based duct sealants to meet different application, budget, and jobsite needs:
PROseal® & FIBERseal®
- Premium, water-based formulations that deliver dependable performance in demanding HVAC applications.
- PROseal features a smooth texture, while FIBERseal adds fiber reinforcement for enhanced strength.
EVERseal™ & EZ-Seal®
- Commercial-grade formulations that provide reliable performance at a cost-effective price point.
- EVERseal features a smooth texture, while EZ-Seal adds fiber reinforcement for enhanced strength.
EnviroSeal™ & EnviroSeal Plus
- High-viscosity, water-based formulations that offer excellent mold and water resistance for indoor and outdoor installations.
- EnviroSeal features a smooth texture, while EnviroSeal Plus adds fiber reinforcement for enhanced strength.
SOLVseal™
- A premium, low-VOC solvent-based formulation that dries quickly, making it well suited for shorter project timelines.
- Offers minimal shrinkage, high water resistance, and strong sealing performance for demanding jobsite conditions.
Regardless of which one you choose, Ductmate sealants are extremely resistant to cracking and will remain permanently flexible. This is especially useful for applying sealant in the shop and then transporting it to other locations or a project site.
Alongside excellent adhesion to metal, they have a lower brush drag, resulting in better spreadability and allowing for a more even and consistent coating, ensuring an airtight, leak-free seal.
Ready to Buy?
Ductmate products are available at over 350 locations across the US as part of a selective distribution network. Use the Ductmate distributor locator map to find a distributor near you.
Outside the US? Check out our international distributor list. For detailed information on product availability, lead times, or other international sales requests, please email ductmate@ductmate.com.